World’s Largest Saw Manufacturer Starrett Targets UK Bandsaw Market with New Sites and Strategic Shift to B2C Sales Model
11 April 2024
Read Time: 4 Mins | 5 May 2021
What they are used for – how they are used and the various types.
Product quality and accuracy cannot be valid unless referenced to a quality and accurate standard.
Here at Starrett all precision measuring tool standards meet or exceed accuracy and performance specifications of national or international standards and every precision measuring tool is individually inspected.
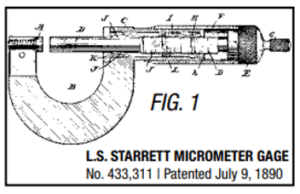
A brief history of the Starrett Micrometer in the words of L.S Starrett himself “The first one I ever had was rather crude and I at once saw that improvements were needed. There was too much stock in the anvil head which prevented it from being used in certain places. The screw threads were not covered, the adjustment too slow. There was no locking device for screw or spindle which was needed to cause a close fit or to lock it firmly to preserve its setting. I decided to improve it and put on the market a micrometer of my own make. I reduced the stock around the anvil, making a neater appearance. I attached a small, knurled thumb piece ‘speeder’ to the screw to rotate between the thumb and finger to speed it up and cause the more sensitive adjustment; I adopted a covered screw; I put a split bushing in the hub around the spindle and a hollow, knurled adjusting nut to telescope it to either cause a close fit around the spindle or lock it firmly to preserve its setting.” “Still, I was never satisfied with the slow adjustments of the micrometer screw, which requires forty revolutions to open or close one inch. I therefore gave serious study to devising a micrometer that would be absolutely accurate and capable of being adjusted instantly to its work within the range of its screw. It gave me much pleasure to accomplish this to my entire satisfaction.” “The principle of this quick adjustment consists of a thimble, connected with a spring plunger which slips over the end of a long, split nut, which automatically closes as quickly as pressure on the plunger is removed. The threaded screw is buttress-shaped with straight lip to resist back-thrust, insuring accuracy.”
From these early micrometers the Starrett line has grown to hundreds of different styles and sizes.
Built to the highest standards, Starrett micrometers are available in metric and imperial.
Let us explore:
Outside
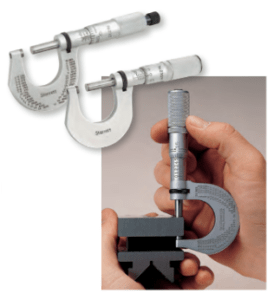
The outside micrometer is the most commonly used type of micrometer.
It is used to measure external dimensions such as the outside diameter of an object.
Used for the accurate measurement of small componentsin mechanical engineering and machining as well as most mechanical trades the outside micrometer is made up of a spindle, which is a very accurately machined calibrated screw and opposite, an anvil, joined by a frame. The object to be measured is placed between the spindle and anvil. The spindle is moved by turning the ratchet knob or thimble until the object to be measured is lightly touched by both the spindle and anvil.
Starrett’s jewel of the outside micrometer, is the 230.
The 230 is used worldwide and being sized at just 6mm between spindle and anvil it reaches most places others cannot.
Readability features – the satin chrome finish is anti-glare and rust resistant. With staggered lines and distinct figures, the advanced sleeve design offers precision and easy readability.
Ease of handling features – the tapered balanced frame is gracefully designed for use in narrow slots and tight spaces.
With a choice of smooth friction thimble for uniform pressure or the combination ratchet and speeder for uniform pressure and quick adjustment along with the ring-type knurled lock nut for quick and sure locking ensures ease of handling and better readability.
Inside
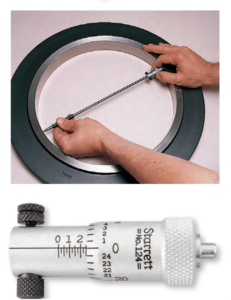
Used for measuring the inside, or inside diameter (ID). They look more like a pen, but with a thimble in the middle that turns. As the thimble turns, the micrometer expands until each end of the tool is touching the inside of the pipe. You then use the numbering system on the thimble to find your measurement.
Starrett produce a number of differing inside micrometers with rigid, tubular steel rod extensions that allow for measuring up to 7350mm.
The most popular is our 124 set. Its lightness, ease of use and range make them very useful for measuring the inside diameters of cylinders and rings and for measuring parallel surfaces.
The measuring rods are manufactured with a shoulder that is set accurately in the micrometer head and lock in position.
Features – Balanced design for better feel and accurate measurement. All contact points are hardened for a longer life. Again, the satin chrome finish and advanced sleeve design offer the same benefits as per the outside micrometer. They also benefit from a firmer rotation than the regular micrometers. This is to limit the tendency of the micrometer head to rotate when being withdrawn from the workpiece.
Depth
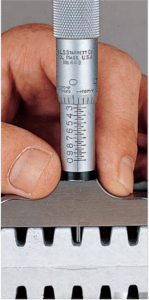
A depth micrometer is used for measuring the depth of a hole, recess or slot.
Depth micrometers have a base that aligns with the top of the recess that needs to be measured. The thimble is on a shaft that sticks up from the base. As the thimble turns, a measurement rod comes down from the shaft. Turn until the rod hits the bottom surface of the hole being measured, then use the numbering system on the thimble to find your measurement.
Starrett offers a varied line of depth micrometer, electronic, mechanical, digital and regular with one or two shoulders and can measure depths up to 225mm using the easily adjustable extensions rods.
Features – a base shape is designed to automatically position the fingers so that it is easily held in place for stability. Bases and rods are hardened and the reding surface is again finished in the satin chrome.
Bench
Especially suited for high precision measurements where the workpiece must be brought to the gauge. Ideal for bench use in a shop environment or inspection laboratory.
The workpiece is staged between the anvil and spindle on an adjustable table, which can be raised and lowered to a selected height and locked in position by turning a knurled thumb screw on the back of the base. The base is made of cast iron and heavily proportioned to sustain gauge accuracy and assure stability when in use.
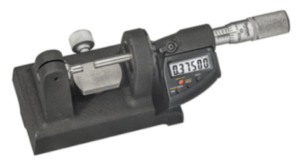
Whatever the type, Starrett measurement readouts are available as electronic, digital and traditional vernier, with varying sizes and accessories. We alsooffer bespoke Special function Micrometers made to your exacting requirements and specific use Micrometers such as our Sheet Metal, Tube, Crankshaft, Paper and Blade.
Back to AllUK and Ireland Expansion Aims to Reclaim Leadership Position in Bandsaw Segment Jedburgh, Scotland – April 8, 2024. In ...
Read MoreTHE L.S. STARRETT COMPANY ENTERS INTO A MERGER AGREEMENT WITH MIDDLEGROUND CAPITAL TO BECOME PRIVATE COMPANY Starrett shareholders will ...
Read MoreBook a slot to discuss product application or information and speak directly with our professional Tech Team.
Book Now© The L. S. Starrett Company Limited 2025. All rights reserved.
Website made with by GRO.